# Image Flashing and Serial Port Connection
## Image Acquisition and Flashing
Images can be generated by compiling SDK source code, or downloaded from the [Kendryte SDK Image Center](https://download.kendryte.com/k230/release/linux_sdk_images/daily_build/).
>1. This section provides multiple flashing options. Please choose the appropriate method based on your actual needs
>2. The image file needs to be extracted before flashing;
>
### Flashing with a Card Reader
>1. After flashing is complete, insert the TF card into the development board, and connect it to the computer via USB cable (optional: press the reset button to reset);
>2. Open the serial port software to view the output information,
>3. For instructions on how to connect the development board and view the serial port, please refer to the following sections.
#### Flashing with a Card Reader under Linux
1. Before inserting the TF card into the host machine (computer), check the current storage devices:
```bash
ls -l /dev/sd*
```
2. Execute the command again after inserting the TF card. The newly added device node is the TF card device.
3. Assuming the TF card device node is `/dev/sdc`, execute the flashing command:
```bash
sudo dd if=sysimage-sdcard.img of=/dev/sdc bs=1M oflag=sync
```
#### Flashing with a Card Reader under Windows
Under Windows, it is recommended to use [rufus](http://rufus.ie/downloads/) or [balenaetcher](https://etcher.balena.io/) to flash the TF card,
> **Notes**
> Some flashing software may have [bugs](https://www.kendryte.com/answer/questions/10010000000002910). If you encounter flashing issues, it is recommended to switch flashing tools.
Steps for flashing with Rufus
1. Insert the TF card into the PC and launch the Rufus tool;
2. Click the "Select" button and choose the firmware image to be flashed;
3. After confirming that the device and image are correct, click "Start"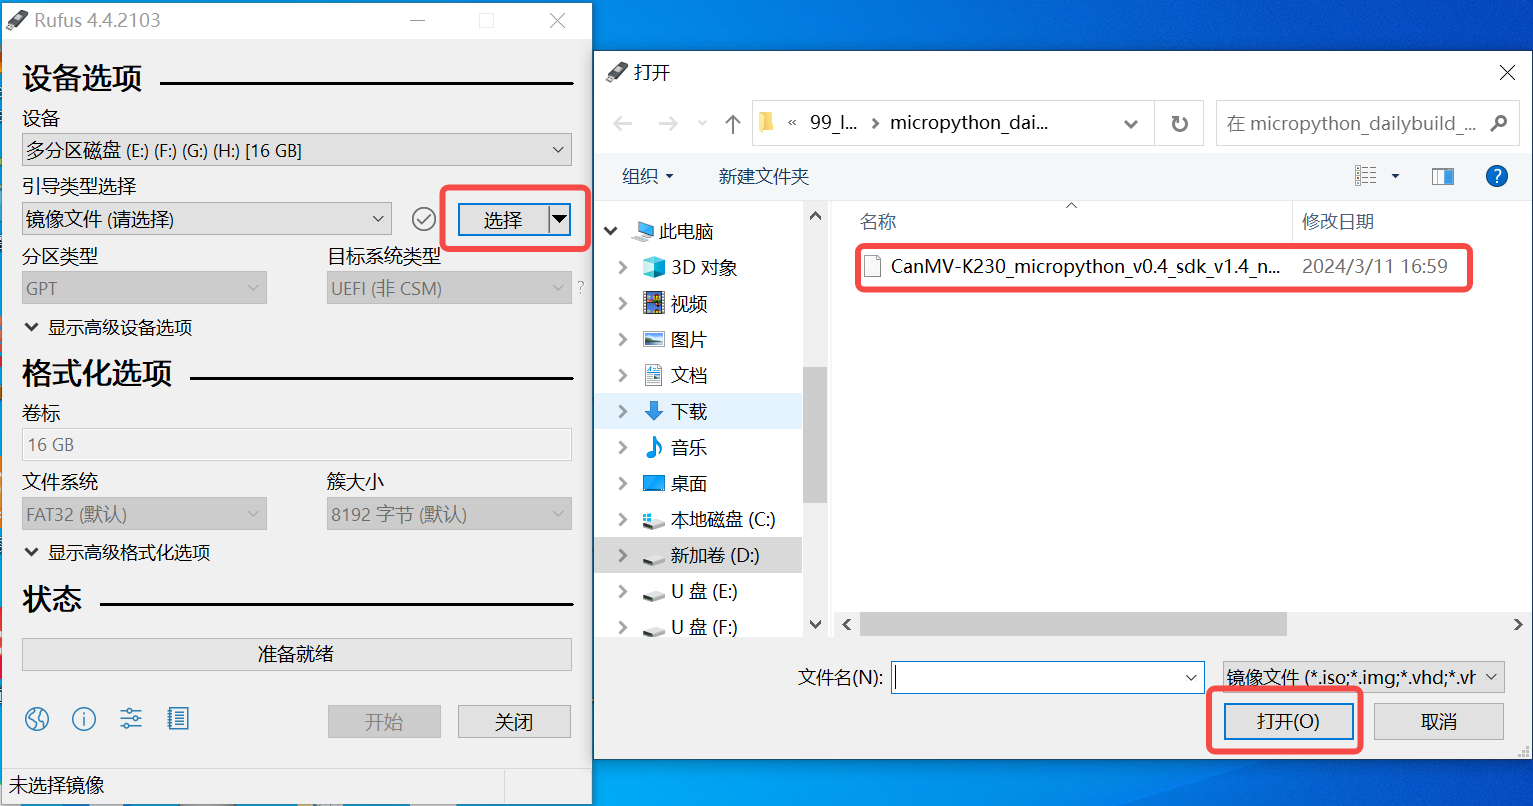
>
### Computer flashing development board via USB
For flashing via USB, please [《Refer to USB Flashing Chapter》](https://www.kendryte.com/k230_rtos/zh/main/userguide/how_to_flash.html#usb)
>The above link is the supporting documentation for RTOS, only the flashing part is universal;
## Development Board Connection
> **Note**
> Please use a reliable Type-C cable that supports data transfer. Cables that only support power supply are not supported.
> The first boot may take a few minutes for filesystem expansion. Please be patient.
### JLC Lushan Pi Development Board
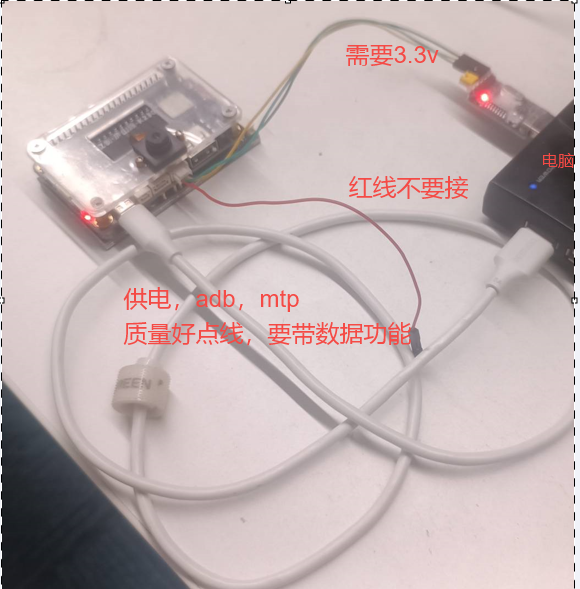
Please refer to the diagram below to connect the serial port of the Lushan Pi development board:
> **Important Notes**
>
> - The serial port only needs to connect **RX (Receive)**, **TX (Transmit)**, and **GND (Ground)** three wires;
> - **The power wire (red wire) is strictly prohibited from being connected**, as incorrect connection may cause the development board to burn out.
> - CanMV IDE is not supported for serial port debugging. Please use standard serial port tools (such as [PuTTY](https://www.putty.org/), Tera Term, or minicom);
> - Default serial port parameters:
> - Baud rate: 115200
> - Data bits: 8
> - Stop bits: 1
> - Parity: None
> - Flow control: None
### 01studio Development Board
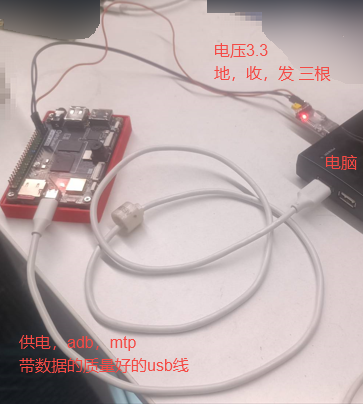
Please refer to the diagram below to connect the serial port of the 01studio development board:
> **Serial Port Debugging Notes**
>
> - CanMV IDE is not supported for serial port debugging. Please use standard serial port tools;
> - Default serial port parameters are the same as the table above.
### CanMV-V1.0/1.1/3.0 Development Board
- Hardware Connection
Use a Type-C cable to connect the CanMV-K230 development board to the computer (as shown in the diagram below)
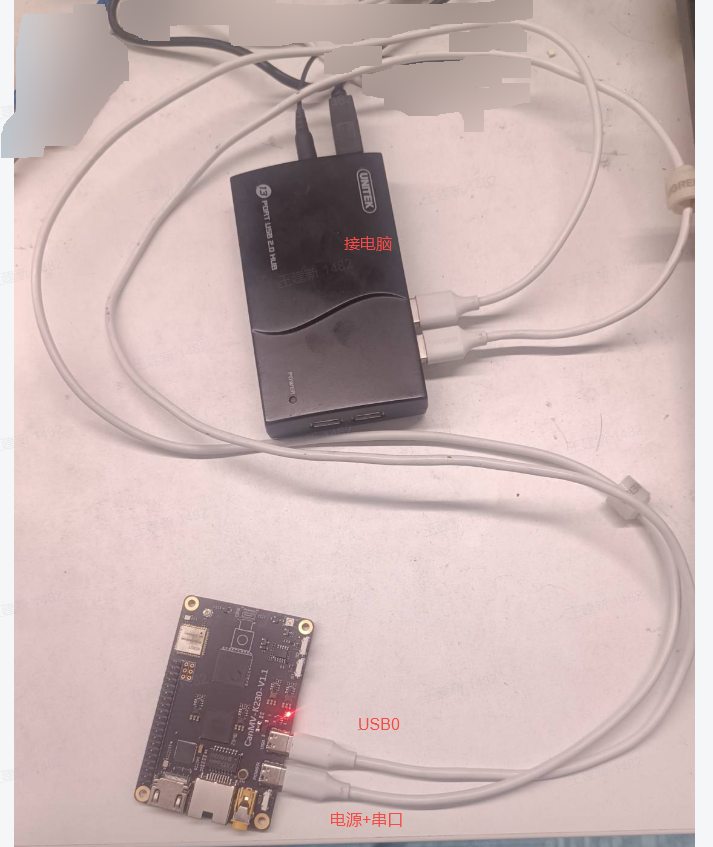
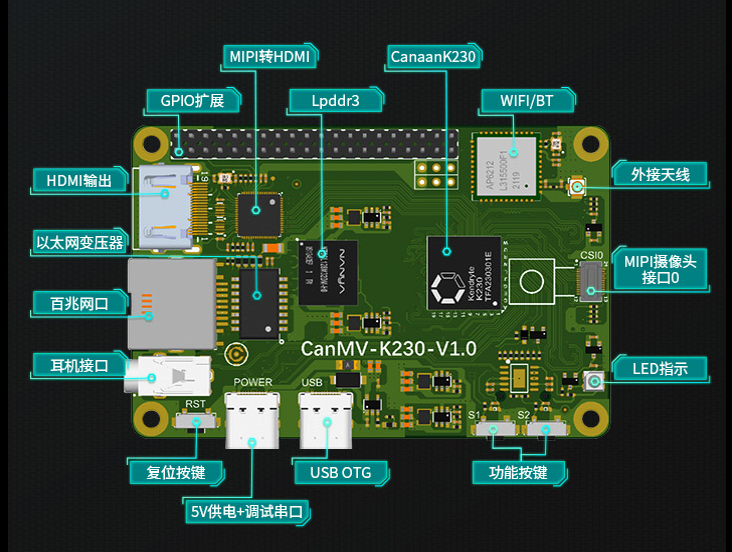
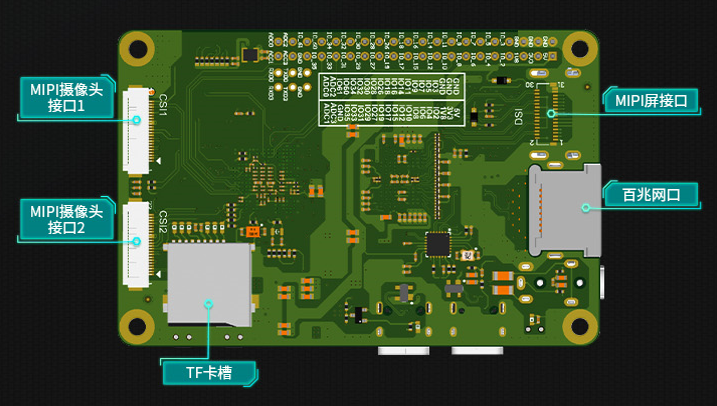
>It is recommended to connect two USB cables:
> The first Type-C cable: used for 5V power supply and debug serial port communication;
> The second Type-C cable: can be used for file transfer via MTP or ADB.
- Serial Port Number Confirmation
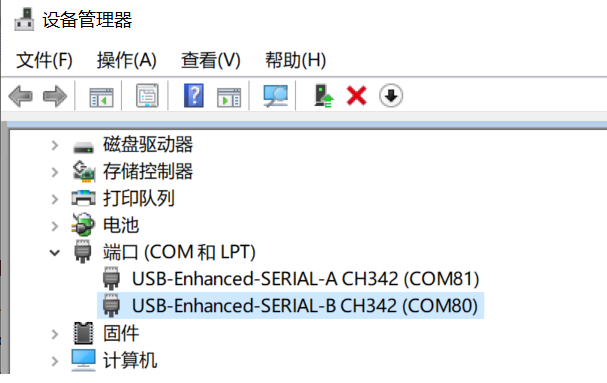
After the device is powered on, the computer will recognize two serial ports:
Windows system displays similar to the following:
| Serial Port Name | Description |
| ----------------------------------- | ------------------------ |
| USB-Enhanced-SERIAL-A CH342 (COM80) | Small core Linux debug serial port |
| USB-Enhanced-SERIAL-B CH342 (COM81) | Serial port 3 (not used yet) |
> If the serial port is recognized **abnormally**, please reinstall the [CH342/CH343 driver](https://www.wch.cn/downloads/CH343SER_EXE.html).
Linux system is similar to the following:
| Device Node | Description |
| -------------- | ------------------------ |
| `/dev/ttyACM0` | Small core Linux debug serial port |
| `/dev/ttyACM1` | Serial port 3 (not used yet) |
> The serial port device can be recognized regardless of whether a TF card is inserted.
- View Serial Port Output
Use serial port software (such as PuTTY, MobaXterm, Xshell, SecureCRT, etc.) to connect to the debug serial port to view output information.
> **Quick Verification**
> When the TF card is not inserted, press the reset button, and the debug serial port will output a line of printing, indicating that the CPU is working normally.
> Baud rate: 115200, Data bits: 8, Stop bits: 1, Parity: None, Flow control: None
### k230d-canmv Development Board
Refer to the diagram below to connect the development board to the computer. [Serial port parameters and usage methods are the same as the CanMV-V1.0/1.1/3.0 development board](#canmv-v10-v11-v30-devboard)
Use a Type-C cable to connect the development board's **Power+UART** interface to the computer:
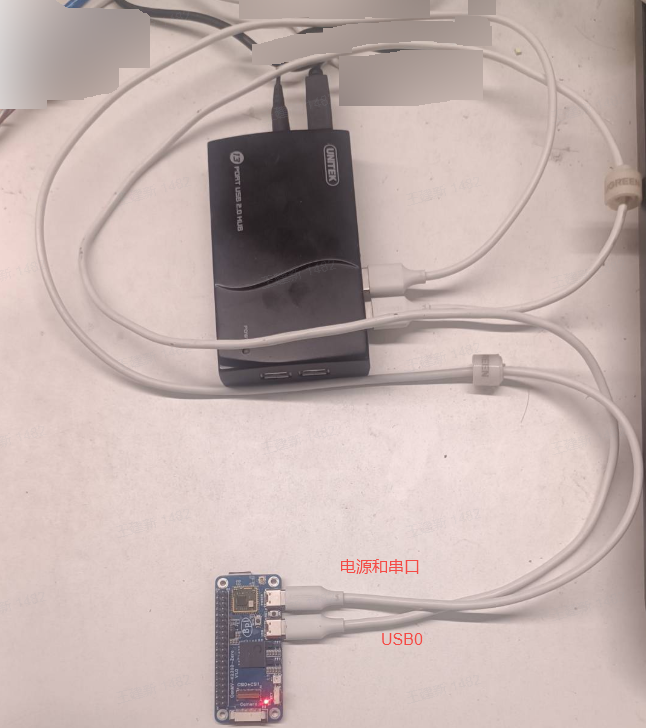
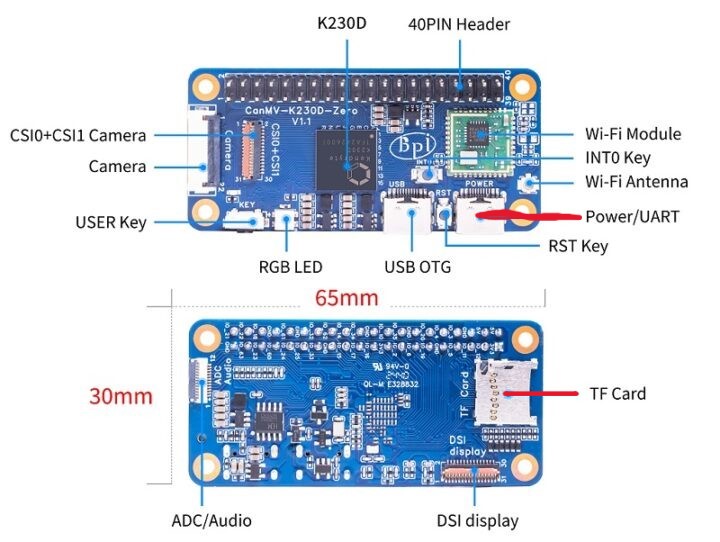
>It is recommended to connect two USB cables (same as CanMV-V1.0/1.1/3.0)
> If the serial port is recognized **abnormally**, please reinstall the [CH342/CH343 driver](https://www.wch.cn/downloads/CH343SER_EXE.html)