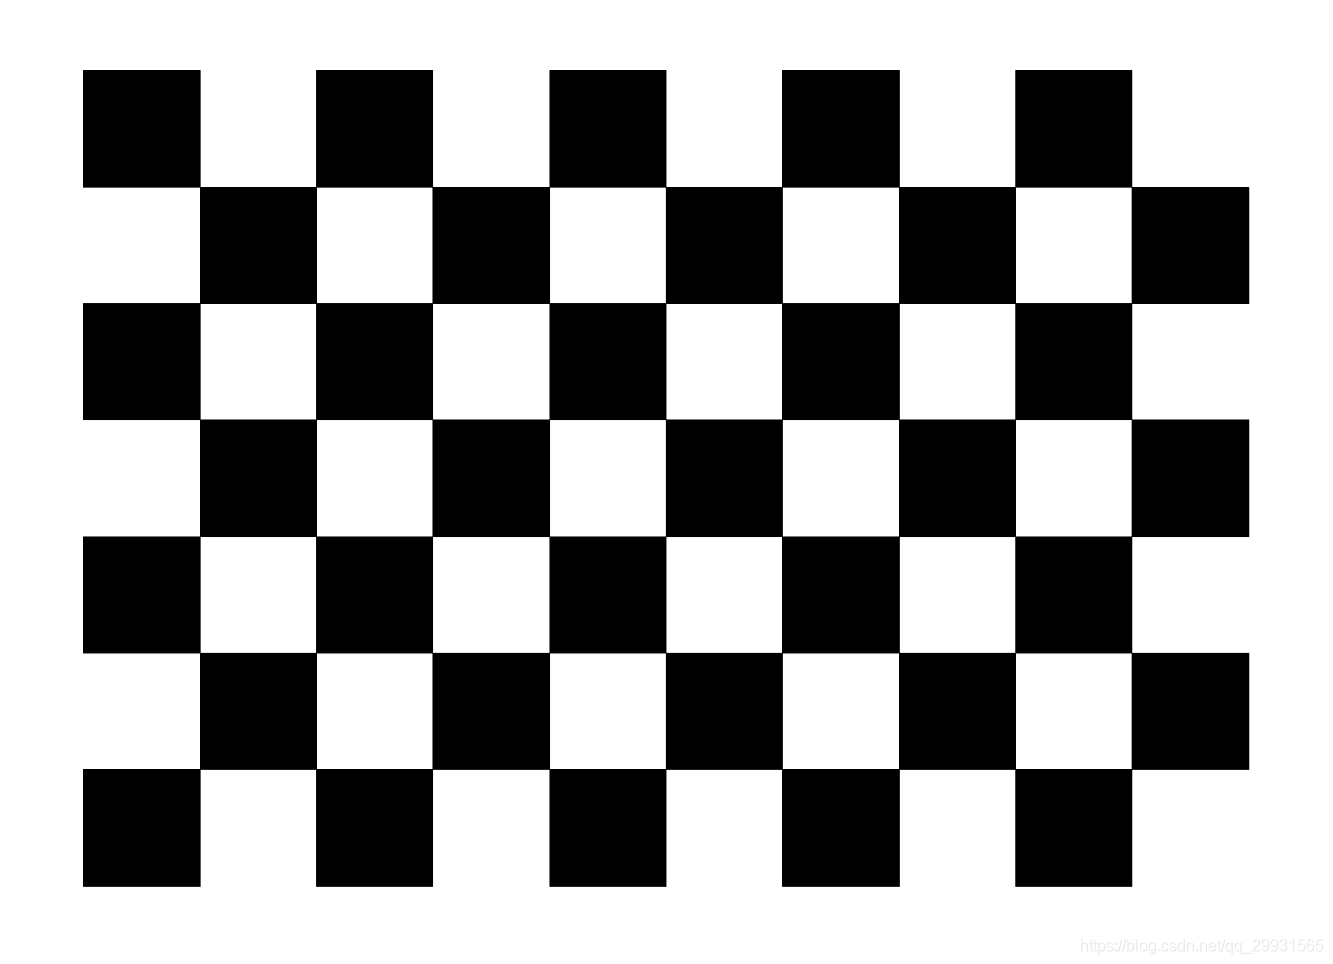
你好,可以使用K230拍棋盘格图之后,使用opencv在pc上进行校准。

参考脚本
K230采集图片
from media.display import *
from media.media import *
from media.sensor import *
import time, os, sys, gc
from machine import TOUCH
from machine import Pin
from machine import FPIOA

#显示的宽高
DISPLAY_WIDTH = ALIGN_UP(800, 16)
DISPLAY_HEIGHT = 480

#采集图片的分辨率
VIDEO_WIDTH = 1920
VIDEO_HEIGHT = 1080

brd = os.uname()[-1]
if brd == "k230_canmv_01studio":
    PRESS_KEY_NUM = 21
elif brd == "k230_canmv_lckfb":
    PRESS_KEY_NUM = 53
else:
    #按键GPIO Number,根据硬件修改
    PRESS_KEY_NUM = 21

del brd

#保存图片的起始编号,可以修改
save_num = 0

#数据采集标准框,采集的物体最好在这个框框内
grab_x = 0
grab_y = 0
grab_w = 0
grab_h = 0

#保存图片的位置和图片名称开头,根据需要修改
IMG_SAVE_PATH="/sdcard/examples/data/"
IMG_SAVE_NAME_BEGIN="1_"

LOGO_FILE="/sdcard/examples/16-AI-Cube/logo.jpg"

FONT_X = int(DISPLAY_WIDTH/2-50)
FONT_Y = int(DISPLAY_HEIGHT/2-10)

#sensor = None

def ensure_directory(path):
    parts = path.strip('/').split('/')
    current = '/'
    for part in parts:
        current += part + '/'
        try:
            os.listdir(current)  # check if directory exists
        except OSError:
            try:
                os.mkdir(current)
            except Exception as e:
                print("Failed to create:", current, e)

def media_init():
    global sensor
    # 根据硬件选择显示的方法,默认为IDE显示
    # use LCD for display
    Display.init(Display.ST7701, width = DISPLAY_WIDTH, height = DISPLAY_HEIGHT, to_ide = True, osd_num=1)

    # use hdmi for display
    # Display.init(Display.LT9611, width = DISPLAY_WIDTH, height = DISPLAY_HEIGHT, to_ide = True, osd_num=1)

    # use IDE for display
    #Display.init(Display.VIRT, width = DISPLAY_WIDTH, height = DISPLAY_HEIGHT, fps = 60)

    sensor = Sensor(fps=30)
    sensor.reset()

    # 这里设置的frame_size方法与实际使用时必现保持一致,否则校准的参数会不准确
    sensor.set_framesize(w=VIDEO_WIDTH, h=VIDEO_HEIGHT,chn=CAM_CHN_ID_0)
#    sensor.set_framesize(w=640, h=480,chn=CAM_CHN_ID_0, crop = ((1920-1280) // 2, (1080 - 960) // 2, 1280, 960))
    sensor.set_pixformat(Sensor.RGB888)
    sensor.set_framesize(w=DISPLAY_WIDTH, h=DISPLAY_HEIGHT, chn=CAM_CHN_ID_2)
    sensor.set_pixformat(Sensor.RGB888, chn=CAM_CHN_ID_2)
    MediaManager.init()
    sensor.run()

def media_deinit():
    global sensor
    os.exitpoint(os.EXITPOINT_ENABLE_SLEEP)
    sensor.stop()
    time.sleep_ms(50)
    Display.deinit()
    MediaManager.deinit()

def save_file(img_0):
    global save_num
    img_1 = img_0.to_jpeg()
    img_name = IMG_SAVE_NAME_BEGIN + str(save_num) + ".jpg"
    img_1.save(IMG_SAVE_PATH + img_name, quality = 99)
    print("save img " + IMG_SAVE_PATH + img_name)
    save_num += 1
    gc.collect()
    return img_name

def gpio_init():
    global KEY
    fpioa = FPIOA()
    fpioa.set_function(PRESS_KEY_NUM,FPIOA.GPIO21)
    KEY=Pin(PRESS_KEY_NUM, Pin.IN, Pin.PULL_UP) #构建KEY对象

def show_logo():
    logo_img = image.Image(LOGO_FILE)
    print("show logo w: " + str(logo_img.width()) + ", h: " + str(logo_img.height()))
    Display.show_image(logo_img.to_rgb888())
    time.sleep(2)


def index_init():
    global save_num
    for file in os.listdir(IMG_SAVE_PATH):
        if file is None:
            break
        if file.startswith(IMG_SAVE_NAME_BEGIN):
            index = file.split('_')[1]
            index = int(index.split('.')[0])
            if save_num <= index:
                save_num = index + 1
    print("index_init start " + str(save_num))

def key_handle(img_save, img_display):
    global KEY, grab_x, grab_y, grab_w, grab_h
    if KEY.value()==0:   #按键被按下
        time.sleep_ms(10) #消除抖动
        if KEY.value()==0: #确认按键被按下
            print('Save')
            img_name = save_file(img_save)
            img_display.draw_string_advanced(0, 0, 100, img_name, color = (0, 0, 255))
            time.sleep(0.8)

            while not KEY.value(): #检测按键是否松开
                pass

    Display.show_image(img_display) #显示图片

try:
    ensure_directory(IMG_SAVE_PATH)
    media_init()
    gpio_init()
    index_init()
#    show_logo()
    while True:
        img_save = sensor.snapshot(chn=CAM_CHN_ID_0)
        img_display = sensor.snapshot(chn=CAM_CHN_ID_2)
        key_handle(img_save, img_display)
        time.sleep_ms(10)
except BaseException as e:
    import sys
    sys.print_exception(e)
media_deinit()
gc.collect()
PC校准脚本
import cv2
import numpy as np
import glob
import os
import json

# 棋盘格内角点的行列数(注意是内角点数,不是方格数)
chessboard_size = (9, 6)  # 9列6行内角点
square_size = 2.4  # 每个格子的大小,单位为 cm

# 构建棋盘格在世界坐标中的3D点(Z=0 平面)
objp = np.zeros((chessboard_size[0] * chessboard_size[1], 3), np.float32)
objp[:, :2] = np.mgrid[0:chessboard_size[0], 0:chessboard_size[1]].T.reshape(-1, 2)
objp *= square_size  # 实际世界坐标按格子大小缩放

# 用于存储所有图像中的3D和2D点
obj_points = []  # 3D 点
img_points = []  # 2D 点

# 加载图像路径
images = glob.glob("test/*.jpg")  # 替换为你图像的实际路径

# 遍历每张图像进行角点检测
for fname in images:
    img = cv2.imread(fname)
    if img is None:
        print(f"无法读取图像: {fname}")
        continue
    gray = cv2.cvtColor(img, cv2.COLOR_BGR2GRAY)
    size = gray.shape[::-1]

    # 寻找棋盘格角点
    ret, corners = cv2.findChessboardCorners(gray, chessboard_size, None)

    if ret:
        # 追加3D点
        obj_points.append(objp)
        # 精细化角点
        corners2 = cv2.cornerSubPix(
            gray, corners, (5, 5), (-1, -1),
            (cv2.TERM_CRITERIA_EPS + cv2.TERM_CRITERIA_MAX_ITER, 30, 0.001)
        )
        img_points.append(corners2)

        # 绘制并显示角点
        cv2.drawChessboardCorners(img, chessboard_size, corners2, ret)
        cv2.imshow('Corners', img)
        cv2.waitKey()
    else:
        print(f"角点检测失败: {fname}")

cv2.destroyAllWindows()

# 执行标定
ret, mtx, dist, rvecs, tvecs = cv2.calibrateCamera(obj_points, img_points, size, None, None)

# 提取相机内参
fx = mtx[0, 0]
fy = mtx[1, 1]
cx = mtx[0, 2]
cy = mtx[1, 2]
f_avg = (fx + fy) / 2

# 显示内参和焦距
print("\nCamera Matrix (mtx):\n", mtx)
print("\nDistortion Coefficients (dist):\n", dist)
print(f"\nFocal Length fx: {fx:.2f}, fy: {fy:.2f}, average f: {f_avg:.2f}")
print(f"Optical Center cx: {cx:.2f}, cy: {cy:.2f}")

# 保存为 JSON 文件
output = {
    "camera_matrix": mtx.tolist(),
    "dist_coeff": dist.tolist(),
    "fx": fx,
    "fy": fy,
    "cx": cx,
    "cy": cy,
    "f_average": f_avg
}
with open("camera_calibration_result.json", "w") as f:
    json.dump(output, f, indent=4)
print("\n标定结果已保存到 camera_calibration_result.json")

# 创建保存文件夹
os.makedirs("undistorted_output", exist_ok=True)

# (可选)保存去畸变效果图
for fname in images:  # 仅处理前3张图
    img = cv2.imread(fname)
    h, w = img.shape[:2]
    newcameramtx, roi = cv2.getOptimalNewCameraMatrix(mtx, dist, (w, h), 1, (w, h))

    # 去畸变
    dst = cv2.undistort(img, mtx, dist, None, newcameramtx)

    # 构造保存路径
    base_name = os.path.basename(fname)
    save_path = os.path.join("undistorted_output", f"undistorted_{base_name}")

    # 保存图像
    cv2.imwrite(save_path, dst)
    print(f"保存去畸变图像: {save_path}")

cv2.destroyAllWindows()
