问题描述
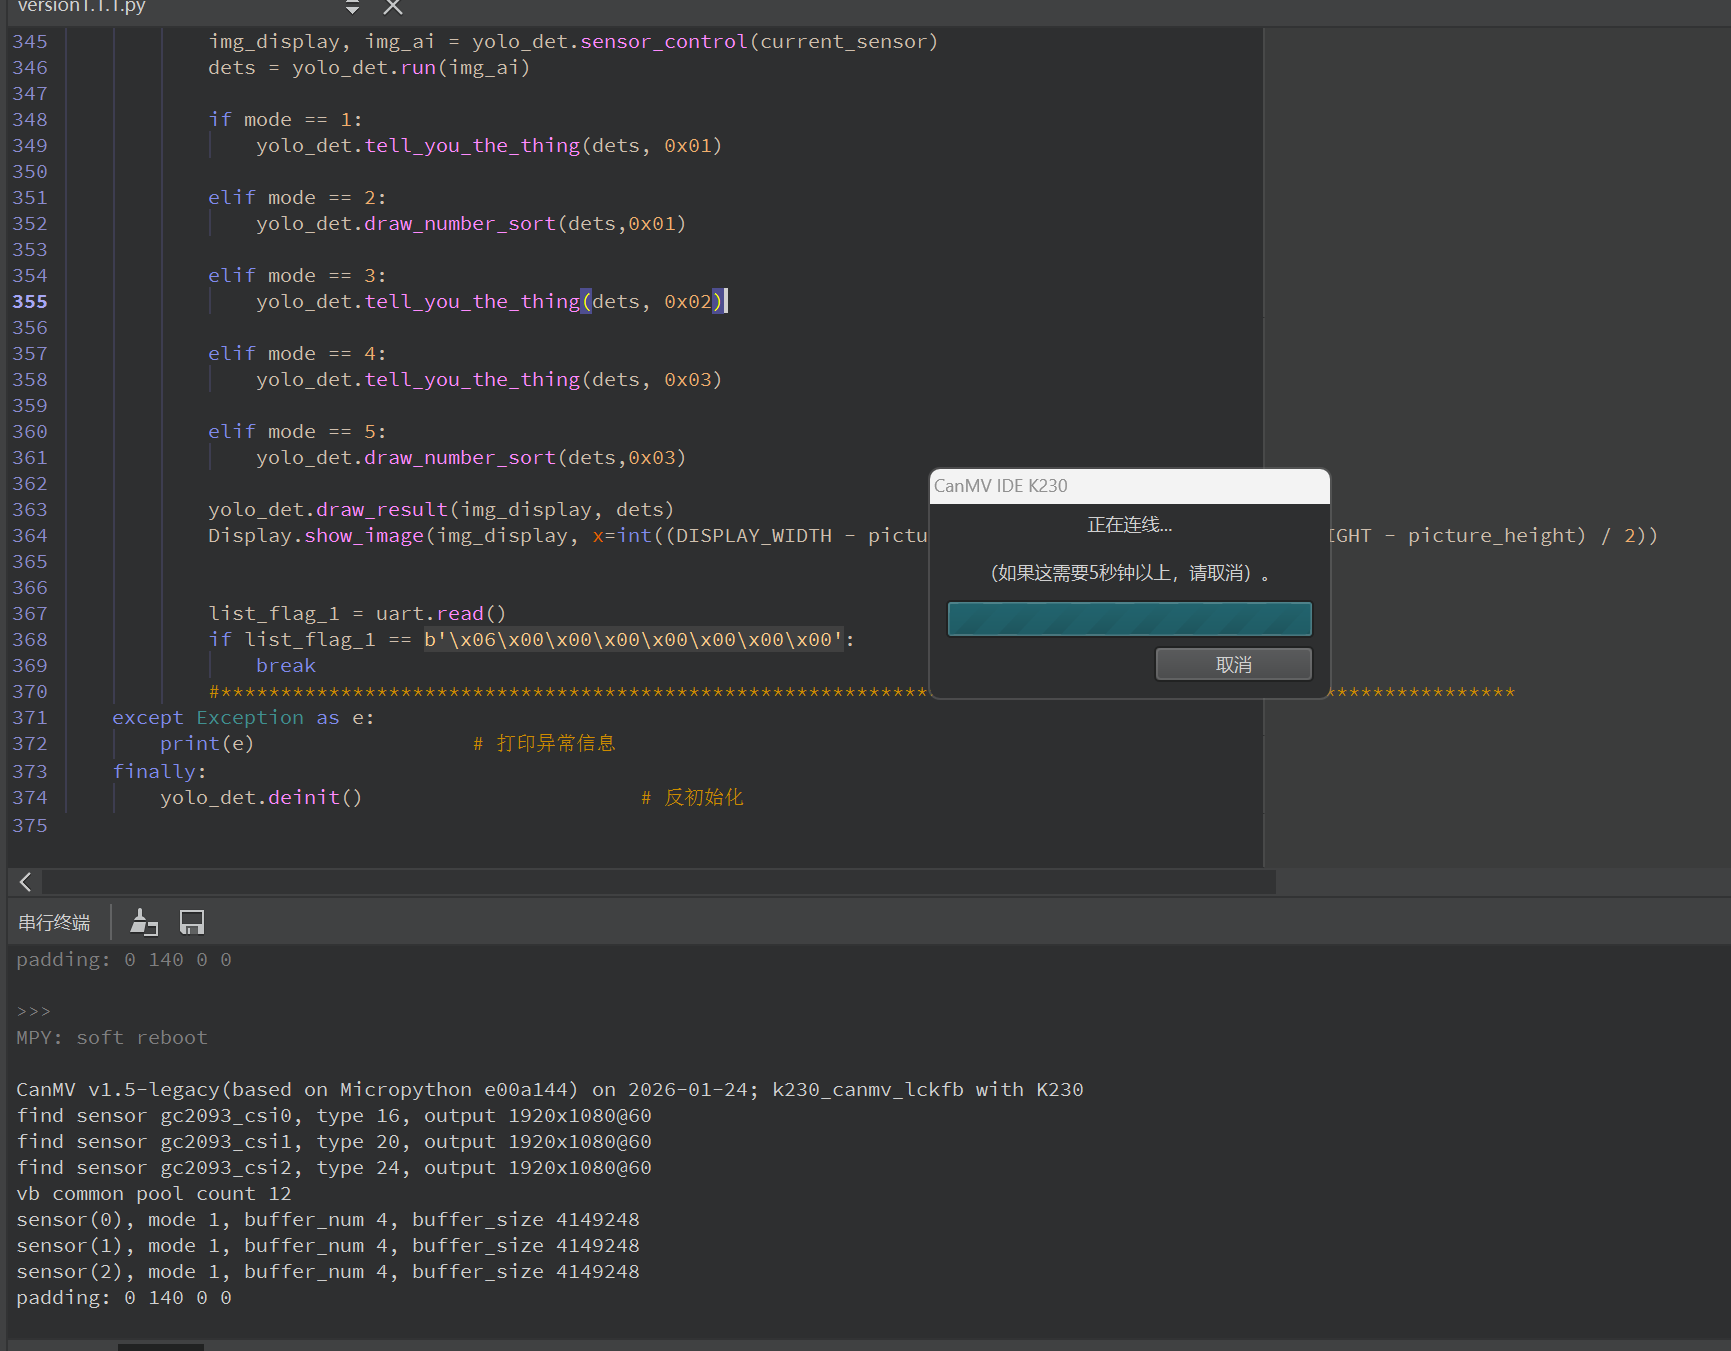
在先前大佬的指点下,我完成了庐山派K230的三个摄像头的配置,但是在实现过程中出现了一些问题,当我尝试运行代码时,发现K230刚开始运行就与电脑断连了(后面经过排查排除了硬件问题),推测有可能是K230的内存不够导致的,我的代码的主要任务如下:
1、我需要用摄像头1来识别“me”、“you”、“he”三种物体,并且支持两种观察模式(一种是三种物体同时看到并以从左到右(按识别到的数据x从小到大)的形式来排序成信息用串口返回,另一种是挨个挨个看,并将看到的种类按特定数字用串口返回);
2、摄像头二用于识别单一的物体并将该物体以特定数字用串口返回;
3、摄像头3和摄像头1类似,来识别‘1’,‘2’,‘3’,‘4’,‘5’这些数字,并且支持两种观察模式(一种是五个数字同时看到并以从左到右(按数据x从小到大)的形式来排序成信息用串口返回,另一种是挨个挨个看,并将看到的种类按特定数字用串口返回);
然后所有摄像头的运行顺序是:显示拍摄-》显示-》如果收到指令开始ai识别(循环开始)-》显示拍摄、ai拍摄-》ai处理-》返回信息并以显示的比例在lcd屏上画对应的框-》收到结束指令(循环结束)
我的代码如下:
from libs.PipeLine import PipeLine, ScopedTiming
from libs.AIBase import AIBase
from libs.AI2D import Ai2d
import os,sys,gc,time,random,utime,urandom, math
import ujson
from media.media import *
from time import *
import nncase_runtime as nn
import ulab.numpy as np
import image,aidemo,aicube
from media.sensor import *
from media.display import *
from machine import Pin,FPIOA,UART
#import time, os, sys
from libs.PipeLine import ScopedTiming
from libs.Utils import *

#配置串口
fpioa = FPIOA()
fpioa.set_function(50, FPIOA.UART3_TXD)
fpioa.set_function(51, FPIOA.UART3_RXD)
fpioa.set_function(53, FPIOA.GPIO53)

#对分辨率进行一些配置
display_width = 800
display_height = 480
uart = UART(UART.UART3, baudrate=115200, bits=UART.EIGHTBITS, parity=UART.PARITY_NONE, stop=UART.STOPBITS_ONE)

OUT_RGB888P_WIDTH = ALIGN_UP(640, 16)
OUT_RGB888P_HEIGHT = 360

# 显示模式选择
DISPLAY_MODE = "LCD"

picture_width = 800
picture_height = 480

if DISPLAY_MODE == "LCD":
    DISPLAY_WIDTH = 800
    DISPLAY_HEIGHT = 480


class_1_map = {
    "one": 0x01,
    "two": 0x02,
    "three": 0x03,
    "four": 0x04,
    "five": 0x05,
    "greenpee": 0x06,
    "yellowpee": 0x07,
    "whitepee": 0x08
}

#分辨率比例转换,这里用于将lcd屏幕的800*480转换为适用于YOLO的分辨率640
def two_side_pad_param(input_size, output_size):
    ratio_w = output_size[0] / input_size[0]  # 宽度缩放比例
    ratio_h = output_size[1] / input_size[1]  # 高度缩放比例
    ratio = min(ratio_w, ratio_h)  # 取较小的缩放比例
    new_w = int(ratio * input_size[0])  # 新宽度
    new_h = int(ratio * input_size[1])  # 新高度
    dw = (output_size[0] - new_w) / 2  # 宽度差
    dh = (output_size[1] - new_h) / 2  # 高度差
    top = int(round(dh - 0.1))
    bottom = int(round(dh + 0.1))
    left = int(round(dw - 0.1))
    right = int(round(dw + 0.1))
    return top, bottom, left, right, ratio

def split_coordinates(value):
    """
    将一个16位数值拆分为高字节和低字节
    value: 要拆分的16位整数值
    return: (high_byte, low_byte) 元组
    """
    high_byte = (value >> 8) & 0xFF  # 右移8位获取高字节
    low_byte = value & 0xFF          # 与0xFF按位与获取低字节
    return high_byte, low_byte

# 自定义YOLO检测类,继承自AIBase基类
class YOLOv11App(AIBase):
    def __init__(self, kmodel_path, model_input_size, anchors, confidence_threshold=0.8, nms_threshold=0.2, rgb888p_size = [640, 360], display_size=[800,480], debug_mode=0):
        super().__init__(kmodel_path, model_input_size, rgb888p_size, debug_mode)  # 调用基类的构造函数
        self.class_id = ["me", "you", "he", "one", "two", "three", "four", "five"]
        self.kmodel_path = kmodel_path  # 模型文件路径
        self.model_input_size = model_input_size  # 模型输入分辨率
        self.confidence_threshold = confidence_threshold  # 置信度阈值
        self.nms_threshold = nms_threshold  # NMS(非极大值抑制)阈值
        self.anchors = anchors  # 锚点数据,用于目标检测
        self.rgb888p_size = [ALIGN_UP(rgb888p_size[0], 16), rgb888p_size[1]]  # sensor给到AI的图像分辨率,并对宽度进行16的对齐
        self.display_size = [ALIGN_UP(display_size[0], 16), display_size[1]]  # 显示分辨率,并对宽度进行16的对齐
        self.debug_mode = debug_mode  # 是否开启调试模式
        self.ai2d = Ai2d(debug_mode)  # 实例化Ai2d,用于实现模型预处理
        self.ai2d.set_ai2d_dtype(nn.ai2d_format.NCHW_FMT, nn.ai2d_format.NCHW_FMT, np.uint8, np.uint8)  # 设置Ai2d的输入输出格式和类型
        self.last_result = None
        self.stable_count = 0

    # 配置预处理操作,这里使用了pad和resize,Ai2d支持crop/shift/pad/resize/affine,具体代码请打开/sdcard/app/libs/AI2D.py查看
    def config_preprocess(self, input_image_size=None):
        with ScopedTiming("set preprocess config", self.debug_mode > 0):  # 计时器,如果debug_mode大于0则开启
            ai2d_input_size = input_image_size if input_image_size else self.rgb888p_size  # 初始化ai2d预处理配置,默认为sensor给到AI的尺寸,可以通过设置input_image_size自行修改输入尺寸
            top, bottom, left, right = self.get_padding_param()  # 获取padding参数
            print("padding: {} {} {} {}".format(top, bottom, left, right))
            self.ai2d.pad([0, 0, 0, 0, top, bottom, left, right], 0, [104, 117, 123])  # 填充边缘
            self.ai2d.resize(nn.interp_method.tf_bilinear, nn.interp_mode.half_pixel)  # 缩放图像
            self.ai2d.build([1,3,ai2d_input_size[1],ai2d_input_size[0]],[1,3,self.model_input_size[1],self.model_input_size[0]])  # 构建预处理流程

    # 自定义当前任务的后处理,results是模型输出array列表
    def postprocess(self, results):
        counter = 0
        det_res = []
        with ScopedTiming("postprocess", self.debug_mode > 0):
            # 输出形状为[1, 1, 14, 2100]
            # 意思是,输出了2100个框,每个框有14个数据,其中前4个数据是xywh,后面10个是每个类别对应的置信度,这里的xy指的是中心点坐标
            for i in range(2100):
                result = results[0][0][:, i]
                max_score = max(result[4:])
                if max_score > self.confidence_threshold:
                    # 这里把位置信息恢复到1920 * 1080画布下的状态
                    x = result[0] * max(self.rgb888p_size) / max(self.model_input_size)
                    y = result[1] * max(self.rgb888p_size) / max(self.model_input_size)
                    w = result[2] * max(self.rgb888p_size) / max(self.model_input_size)
                    h = result[3] * max(self.rgb888p_size) / max(self.model_input_size)
                    det_res.append([x, y, w, h, list(result[4:]).index(max_score), max_score])
            # 这里还需要一个NMS处理,因为,套框问题比较严重,但是我这里暂时没空写这个东西了,于是简单的按照,每个类别只检测一个物体,按这个逻辑来写
            # 后续可能会把NMS也写在这里,现在暂时不写了
            det_res.sort(key=lambda x:x[-1], reverse=True)
            det_res_single = []
            added_class = []
            for result in det_res:
                if not result[-2] in added_class:
                    added_class.append(result[-2])
                    det_res_single.append(result)
        return det_res_single

    # 绘制检测结果到画面上
    def draw_result(self, pl, dets):
        with ScopedTiming("display_draw", self.debug_mode > 0):
            if dets:
                pl.osd_img.clear()  # 清除OSD图像
                for det in dets:
                    # 将检测框的坐标转换为显示分辨率下的坐标
                    x, y, w, h = map(lambda x: int(round(x, 0)), det[:4])
                    x = x * self.display_size[0] // self.rgb888p_size[0]
                    y = y * self.display_size[1] // self.rgb888p_size[1]
                    w = w * self.display_size[0] // self.rgb888p_size[0]
                    h = h * self.display_size[1] // self.rgb888p_size[1]
                    pl.osd_img.draw_rectangle(x - w//2, y - h // 2, w, h, color=(255, 0, 255, 0), thickness=2)  # 绘制矩形框
                    pl.osd_img.draw_string_advanced(x - w//2, y - h // 2, 80, "{} {}".format(self.class_id[det[-2]], round(det[-1], 2)), color=(255, 0, 255, 0)) # 画标签和置信度
            else:
                pl.osd_img.clear()

    # 对检测结果进行一个大致的检测
    def draw_number_sort(self,dets , sensor_number):
        for det in dets:
                conf = det[5]
                # 过滤置信度 < 0.80 的目标(核心过滤逻辑)
                if conf < 0.80:
                    continue  # 跳过低置信度目
        res_sorted = sorted(dets, key=lambda x: x[0])
        send_data = []
        for obj in res_sorted:
            class_idnum = obj[4]
            cls_name = self.class_id[int(class_idnum)]
            if cls_name in class_1_map:
                send_data.append(cls_name)
                send_data = send_data[:5]
                MA = bytearray([sensor_number, 0x00, send_data[0], send_data[1], send_data[2], send_data[3], send_data[4], 0x6B])

        return send_data

    # 获取padding参数
    def get_padding_param(self):
        dst_w = self.model_input_size[0]  # 模型输入宽度
        dst_h = self.model_input_size[1]  # 模型输入高度
        ratio_w = dst_w / self.rgb888p_size[0]  # 宽度缩放比例
        ratio_h = dst_h / self.rgb888p_size[1]  # 高度缩放比例
        ratio = min(ratio_w, ratio_h)  # 取较小的缩放比例
        new_w = int(ratio * self.rgb888p_size[0])  # 新宽度
        new_h = int(ratio * self.rgb888p_size[1])  # 新高度
        dw = (dst_w - new_w) / 2  # 宽度差
        dh = (dst_h - new_h) / 2  # 高度差
        top = int(round(0))
        bottom = int(round(dh * 2 + 0.1))
        left = int(round(0))
        right = int(round(dw * 2 - 0.1))
        return top, bottom, left, right

    def tell_you_the_thing(self, dets, sensor_number):
        if not dets:
            return None
        # ===== 选置信度最高的目标 =====
        det = max(dets, key=lambda x: x[5])
        x, y, w, h, class_id, score = det
        # ===== 过滤置信度 =====
        if score < 0.85:
            return None
        # ===== 获取类别名 =====
        cls_name = self.class_id[int(class_id)]
        # ===== 防抖 =====
        if cls_name is self.last_result:
            self.stable_count += 1
        else:
            self.stable_count = 0

        self.last_result = cls_name

        if self.stable_count < 2:
            return None# 不稳定,不发送

        # ===== 映射 =====
        if cls_name not in class_1_map:
            return None
        cls_code = class_1_map[cls_name]
        # ===== 串口发送 =====
        MA = bytearray([sensor_number,0x00, 0x00, 0x00, 0x00, 0x00,cls_code,0x6D])
        uart.write(MA)
        return cls_code

    def sensor_control(self,sensor):
        img_ai = sensor.snapshot(chn=2)
        img_display = sensor.snapshot(chn=0)
        return img_display, img_ai

if __name__ == "__main__":
    sensor0 = Sensor(id=0)
    sensor0.reset()
    #显示通道给lcd
    sensor0.set_framesize(width=800, height=480, chn=CAM_CHN_ID_0)
    sensor0.set_pixformat(Sensor.RGB565, chn=CAM_CHN_ID_0)
#    #AI通道给yolo
    sensor0.set_framesize(width=OUT_RGB888P_WIDTH, height=OUT_RGB888P_HEIGHT, chn=CAM_CHN_ID_2)
    sensor0.set_pixformat(Sensor.RGBP888, chn=CAM_CHN_ID_2)
    sensor0.set_hmirror(True)
    sensor0.set_vflip(True)

    sensor1 = Sensor(id=1)
    sensor1.reset()
    #显示通道给lcd
    sensor1.set_framesize(width=800, height=480, chn=CAM_CHN_ID_0)
    sensor1.set_pixformat(Sensor.RGB565, chn=CAM_CHN_ID_0)
    #AI通道给yolo
    sensor1.set_framesize(width=OUT_RGB888P_WIDTH, height=OUT_RGB888P_HEIGHT, chn=CAM_CHN_ID_2)
    sensor1.set_pixformat(Sensor.RGBP888, chn=CAM_CHN_ID_2)
    sensor1.set_hmirror(True)
    sensor1.set_vflip(True)

    sensor2 = Sensor(id=2)
    sensor2.reset()
    #显示通道给lcd
    sensor2.set_framesize(width=800, height=480, chn=CAM_CHN_ID_0)
    sensor2.set_pixformat(Sensor.RGB565, chn=CAM_CHN_ID_0)
    #AI通道给yolo
    sensor2.set_framesize(width=OUT_RGB888P_WIDTH, height=OUT_RGB888P_HEIGHT, chn=CAM_CHN_ID_2)
    sensor2.set_pixformat(Sensor.RGBP888, chn=CAM_CHN_ID_2)
    sensor2.set_hmirror(True)
    sensor2.set_vflip(True)

    Display.init(Display.ST7701, width=800, height=480, to_ide= True)
    clock = time.clock()
    # 初始化媒体管理器
    MediaManager.init()
    # 启动传感器
    sensor0.run()
    sensor1.run()
    sensor2.run()
    # 显示模式,默认"hdmi",可以选择"hdmi"和"lcd"
    display_mode="lcd"
    # k230保持不变,k230d可调整为[640,360]
    rgb888p_size = [1920, 1080]

    if display_mode=="hdmi":
        display_size=[1920,1080]
    else:
        display_size=[800,480]
    # 设置模型路径和其他参数
    kmodel_path = "/sdcard/best.kmodel"
    # 其它参数
    confidence_threshold = 0.8
    nms_threshold = 0.2
    anchor_len = None
    det_dim = 4
    anchors_path = None
    anchors = None
    anchors = None
    # 初始化自定义物体检测实例
    yolo_det = YOLOv11App(kmodel_path, model_input_size=[320, 320], anchors=anchors, confidence_threshold=confidence_threshold, nms_threshold=nms_threshold, rgb888p_size=rgb888p_size, display_size=display_size, debug_mode=0)
    yolo_det.config_preprocess()  # 配置预处理

    mode = 0
    current_sensor = sensor0

    try:
        while True:
            os.exitpoint()                      # 检查是否有退出信号
            #*****************************************************************************************************
            clock.tick()
            time.sleep_ms(10)
            # 显示实时帧数
            # 串口数据接收处理sensors
            data = uart.read()
            #print(list_flag)
#               if list_flag is None:
#                    continue
            print(f"接收到数据: {data}")

    # ===== 串口读取 =====
            if data and len(data) == 8:
                uart_flag = data
                #根据不同的要求、场景来选择不同的摄像头
                if uart_flag == b'\x01\x01\x00\x00\x00\x00\x00\x00':
                    mode = 1
                    current_sensor = sensor0

                elif uart_flag == b'\x01\x02\x00\x00\x00\x00\x00\x00':
                    mode = 2
                    current_sensor = sensor0

                elif uart_flag == b'\x02\x00\x00\x00\x00\x00\x00\x00':
                    mode = 3
                    current_sensor = sensor1

                elif uart_flag == b'\x03\x01\x00\x00\x00\x00\x00\x00':
                    mode = 4
                    current_sensor = sensor2
                elif uart_flag == b'\x03\x02\x00\x00\x00\x00\x00\x00':
                    mode = 5
                    current_sensor = sensor2

            # ===== 统一处理 =====
            img_display, img_ai = yolo_det.sensor_control(current_sensor)
            dets = yolo_det.run(img_ai)

            if mode == 1:
                yolo_det.tell_you_the_thing(dets, 0x01)

            elif mode == 2:
                yolo_det.draw_number_sort(dets,0x01)

            elif mode == 3:
                yolo_det.tell_you_the_thing(dets, 0x02)

            elif mode == 4:
                yolo_det.tell_you_the_thing(dets, 0x03)

            elif mode == 5:
                yolo_det.draw_number_sort(dets,0x03)

            yolo_det.draw_result(img_display, dets)
            Display.show_image(img_display, x=int((DISPLAY_WIDTH - picture_width) / 2), y=int((DISPLAY_HEIGHT - picture_height) / 2))


            list_flag_1 = uart.read()
            if list_flag_1 == b'\x06\x00\x00\x00\x00\x00\x00\x00':
                break
            #************************************************************************************************************
    except Exception as e:
        print(e)                  # 打印异常信息
    finally:
        yolo_det.deinit()                       # 反初始化
复现步骤
硬件板卡
庐山派K230
软件版本
CanMV_K230_LCKFB_micropython_v1.5-legacy-0-g413737f_nncase_v2.9.0
