YOLOv8 detection example#
Overview#
K230 CanMV YOLOv8 detection is a simple application developed through MicroPython language, with camera data acquisition and reasoning, and detection of targets and frames. This sample program is applied to multiple hardware modules of the K230 CanMV platform: AI2D, KPU, Sensor, Display, etc. This application mainly explains how to implement AI inference under the multimedia module of K230!
📌 This example is a detailed implementation of the PipeLine structure in AI Demo, which is a simplified application layer encapsulation based on the code logic of this application. When the PipeLine structure cannot meet user development needs, you can refer to this part of the code to achieve development!
Hardware environment#
Running this sample program requires the following hardware environment: K230 CanMV development board and supporting Sensor module.
Sample code#
import os,sys
from media.sensor import *
from media.display import *
from media.media import *
import nncase_runtime as nn
import ulab.numpy as np
import time,image,random,gc
from libs.Utils import *

#-----------------------------Other necessary methods---------------------------------------------
# Multi-object detection Non-Maximum Suppression implementation
def nms(boxes,scores,thresh):
    """Pure Python NMS baseline."""
    x1,y1,x2,y2 = boxes[:, 0],boxes[:, 1],boxes[:, 2],boxes[:, 3]
    areas = (x2 - x1 + 1) * (y2 - y1 + 1)
    order = np.argsort(scores,axis = 0)[::-1]
    keep = []
    while order.size > 0:
        i = order[0]
        keep.append(i)
        new_x1,new_y1,new_x2,new_y2,new_areas = [],[],[],[],[]
        for order_i in order:
            new_x1.append(x1[order_i])
            new_x2.append(x2[order_i])
            new_y1.append(y1[order_i])
            new_y2.append(y2[order_i])
            new_areas.append(areas[order_i])
        new_x1 = np.array(new_x1)
        new_x2 = np.array(new_x2)
        new_y1 = np.array(new_y1)
        new_y2 = np.array(new_y2)
        xx1 = np.maximum(x1[i], new_x1)
        yy1 = np.maximum(y1[i], new_y1)
        xx2 = np.minimum(x2[i], new_x2)
        yy2 = np.minimum(y2[i], new_y2)
        w = np.maximum(0.0, xx2 - xx1 + 1)
        h = np.maximum(0.0, yy2 - yy1 + 1)
        inter = w * h
        new_areas = np.array(new_areas)
        ovr = inter / (areas[i] + new_areas - inter)
        new_order = []
        for ovr_i,ind in enumerate(ovr):
            if ind < thresh:
                new_order.append(order[ovr_i])
        order = np.array(new_order,dtype=np.uint8)
    return keep

# Calculate padding scaling ratio and top/bottom/left/right padding sizes
def letterbox_pad_param(input_size,output_size):
    ratio_w = output_size[0] / input_size[0]  # Width scaling ratio
    ratio_h = output_size[1] / input_size[1]   # Height scaling ratio
    ratio = min(ratio_w, ratio_h)  # Take the smaller scaling ratio
    new_w = int(ratio * input_size[0])  # New width
    new_h = int(ratio * input_size[1])  # New height
    dw = (output_size[0] - new_w) / 2  # Width difference
    dh = (output_size[1] - new_h) / 2  # Height difference
    top = int(round(0))
    bottom = int(round(dh * 2 + 0.1))
    left = int(round(0))
    right = int(round(dw * 2 - 0.1))
    return top, bottom, left, right,ratio


#-----------------------------Sensor/Display initialization part-------------------------------

# Define display resolution
DISPLAY_WIDTH = ALIGN_UP(1920, 16)
DISPLAY_HEIGHT = 1080

# Define AI inference frame resolution
AI_RGB888P_WIDTH = ALIGN_UP(1280, 16)
AI_RGB888P_HEIGHT = 720

sensor = Sensor()
sensor.reset()
# Set horizontal mirror and vertical flip; adjust these parameters to make the image upright depending on the board
#sensor.set_hmirror(False)
#sensor.set_vflip(False)

# Configure multi-channel image output from sensor; each channel can have different format and resolution; up to three channels are supported, refer to sensor API documentation
# Channel 0 directly sent to display VO, format YUV420
sensor.set_framesize(width = DISPLAY_WIDTH, height = DISPLAY_HEIGHT,chn=CAM_CHN_ID_0)
sensor.set_pixformat(Sensor.YUV420SP,chn=CAM_CHN_ID_0)
# Channel 1 for AI processing, format RGB888P
sensor.set_framesize(width = AI_RGB888P_WIDTH , height = AI_RGB888P_HEIGHT, chn=CAM_CHN_ID_1)
# Set channel 2 output format
sensor.set_pixformat(Sensor.RGBP888, chn=CAM_CHN_ID_1)

# Bind channel 0 camera image to screen to prevent slow AI processing in another channel affecting display performance, causing lag
sensor_bind_info = sensor.bind_info(x = 0, y = 0, chn = CAM_CHN_ID_0)
Display.bind_layer(**sensor_bind_info, layer = Display.LAYER_VIDEO1)

# OSD image initialization, create a transparent image of the same resolution as the screen for drawing AI results
osd_img = image.Image(DISPLAY_WIDTH, DISPLAY_HEIGHT, image.ARGB8888)

# Set display mode to LT9611 by default, resolution 1920x1080
Display.init(Display.LT9611,width=DISPLAY_WIDTH,height=DISPLAY_HEIGHT,osd_num=1, to_ide = True)
## If using ST7701 LCD screen, default resolution 800*480, also supports 640*480, refer to Display module API documentation
#Display.init(Display.ST7701, width=DISPLAY_WIDTH,height=DISPLAY_HEIGHT,osd_num=1, to_ide=True)

# Limit the frame rate of the bind channel to prevent producer from being too fast
sensor._set_chn_fps(chn = CAM_CHN_ID_0, fps = Display.fps())


#-----------------------------AI model initialization part-------------------------------
# Kmodel path
kmodel_path="/sdcard/examples/kmodel/yolov8n_224.kmodel"
# Class labels
labels = ["person", "bicycle", "car", "motorcycle", "airplane", "bus", "train", "truck", "boat", "traffic light", "fire hydrant", "stop sign", "parking meter", "bench", "bird", "cat", "dog", "horse", "sheep", "cow", "elephant", "bear", "zebra", "giraffe", "backpack", "umbrella", "handbag", "tie", "suitcase", "frisbee", "skis", "snowboard", "sports ball", "kite", "baseball bat", "baseball glove", "skateboard", "surfboard", "tennis racket", "bottle", "wine glass", "cup", "fork", "knife", "spoon", "bowl", "banana", "apple", "sandwich", "orange", "broccoli", "carrot", "hot dog", "pizza", "donut", "cake", "chair", "couch", "potted plant", "bed", "dining table", "toilet", "tv", "laptop", "mouse", "remote", "keyboard", "cell phone", "microwave", "oven", "toaster", "sink", "refrigerator", "book", "clock", "vase", "scissors", "teddy bear", "hair drier", "toothbrush"]
# Model input resolution
model_input_size=[224,224]
# Other parameter settings including threshold, maximum number of detection boxes, etc.
confidence_threshold = 0.3
nms_threshold = 0.4
max_boxes_num = 50
# Colors for different classes
colors=get_colors(len(labels))

# Initialize ai2d preprocessing, configure ai2d padding + resize preprocessing, preprocessing process input resolution is image resolution, output resolution meets model needs, achieving image -> preprocess -> model process
ai2d=nn.ai2d()
# Configure input/output data types and formats for ai2d module
ai2d.set_dtype(nn.ai2d_format.NCHW_FMT, nn.ai2d_format.NCHW_FMT, np.uint8, np.uint8)
# Set padding parameters: size of top, bottom, left, right padding and values for three channels
top,bottom,left,right,ratio=letterbox_pad_param([AI_RGB888P_WIDTH,AI_RGB888P_HEIGHT],model_input_size)
ai2d.set_pad_param(True,[0,0,0,0,top,bottom,left,right], 0, [128,128,128])
# Set resize parameters, configure interpolation method
ai2d.set_resize_param(True,nn.interp_method.tf_bilinear, nn.interp_mode.half_pixel)
# Set input/output dimensions for ai2d module and build builder instance
ai2d_builder = ai2d.build([1,3,AI_RGB888P_HEIGHT,AI_RGB888P_WIDTH], [1,3,model_input_size[1],model_input_size[0]])
# Initialize an empty tensor for ai2d output and kpu input, since ai2d output is usually sent directly to kpu, use one variable here
input_init_data = np.ones((1,3,model_input_size[1],model_input_size[0]),dtype=np.uint8)
kpu_input_tensor = nn.from_numpy(input_init_data)


# Create kpu instance
kpu=nn.kpu()
# Load kmodel
kpu.load_kmodel(kmodel_path)

# Media initialization
MediaManager.init()
# Start sensor
sensor.run()
# Test frame rate
fps = time.clock()
while True:
    fps.tick()
    #------------------------Dump one frame from camera and process----------------------------------
    # Dump one frame from channel 1 in RGB888P format
    img=sensor.snapshot(chn=CAM_CHN_ID_1)
    # Convert to ulab.numpy.ndarray format data, CHW
    img_np=img.to_numpy_ref()
    # Create nncase_runtime.tensor for ai2d preprocessing
    ai2d_input_tensor=nn.from_numpy(img_np)
    #------------------------Preprocessing steps before inference----------------------------------------
    # Execute preprocessing
    ai2d_builder.run(ai2d_input_tensor, kpu_input_tensor)
    #------------------------Use kpu to perform model inference--------------------------------------
    # Set the 0th input of kpu to ai2d preprocessed tensor, if multiple, set them in sequence
    kpu.set_input_tensor(0,kpu_input_tensor)
    # Run model inference on kpu
    kpu.run()
    #------------------------Get output after model inference----------------------------------------
    # Get output tensor from model inference, convert to ulab.numpy.ndarray for post-processing
    results=[]
    for i in range(kpu.outputs_size()):
        output_i_tensor = kpu.get_output_tensor(i)
        result_i = output_i_tensor.to_numpy()
        results.append(result_i)
        del output_i_tensor
    #------------------------Post-processing steps after inference----------------------------------------
    # YOLOv8 detection model has only one output, i.e., results[0]'s shape is [1,box_dim,box_num], results[0][0] means [box_dim,box_num], transpose to [box_num,box_dim] for easier handling per box
    output_data=results[0][0].transpose()
    # First four data points per box are center coordinates and width/height
    boxes_ori = output_data[:,0:4]
    # Remaining data are class scores, use argmax to find max class index and score
    class_ori = output_data[:,4:]
    class_res=np.argmax(class_ori,axis=-1)
    scores_ = np.max(class_ori,axis=-1)
    # Filter boxes by confidence threshold (discard those below), also convert coordinates to x1,y1,x2,y2, scale input resolution coordinates (model_input_size) back to original image (AI_RGB888P_WIDTH,AI_RGB888P_HEIGHT)
    boxes,inds,scores=[],[],[]
    for i in range(len(boxes_ori)):
        if scores_[i]>confidence_threshold:
            x,y,w,h=boxes_ori[i][0],boxes_ori[i][1],boxes_ori[i][2],boxes_ori[i][3]
            x1 = int((x - 0.5 * w)/ratio)
            y1 = int((y - 0.5 * h)/ratio)
            x2 = int((x + 0.5 * w)/ratio)
            y2 = int((y + 0.5 * h)/ratio)
            boxes.append([x1,y1,x2,y2])
            inds.append(class_res[i])
            scores.append(scores_[i])
    # Skip to next frame if no boxes after initial filtering
    if len(boxes)==0:
        continue
    # Convert list to ulab.numpy.ndarray for easier processing
    boxes = np.array(boxes)
    scores = np.array(scores)
    inds = np.array(inds)
    # NMS process, remove overlapping redundant boxes, keep contains indices of remaining boxes
    keep = nms(boxes,scores,nms_threshold)
    dets = np.concatenate((boxes, scores.reshape((len(boxes),1)), inds.reshape((len(boxes),1))), axis=1)
    # Get final detection results
    det_res = []
    for keep_i in keep:
        det_res.append(dets[keep_i])
    det_res = np.array(det_res)
    # Keep top max_box_num boxes to avoid too many detections
    det_res = det_res[:max_boxes_num, :]
    #------------------------Draw detection boxes----------------------------------------
    osd_img.clear()
    # Process each box, convert original image coordinates (AI_RGB888P_WIDTH,AI_RGB888P_HEIGHT) to display screen (DISPLAY_WIDTH,DISPLAY_HEIGHT)
    for det in det_res:
        x_1, y_1, x_2, y_2 = map(lambda pos: int(round(pos, 0)), det[:4])
        draw_x= int(x_1 * DISPLAY_WIDTH // AI_RGB888P_WIDTH)
        draw_y= int(y_1 * DISPLAY_HEIGHT // AI_RGB888P_HEIGHT)
        draw_w = int((x_2 - x_1) * DISPLAY_WIDTH // AI_RGB888P_WIDTH)
        draw_h = int((y_2 - y_1) * DISPLAY_HEIGHT // AI_RGB888P_HEIGHT)
        osd_img.draw_rectangle(draw_x,draw_y, draw_w, draw_h, color=colors[int(det[5])],thickness=4)
        osd_img.draw_string_advanced( draw_x , max(0,draw_y-50), 24, labels[int(det[5])] + " {0:.3f}".format(det[4]), color=colors[int(det[5])])
    #------------------------Show detection results on screen----------------------------------------
    Display.show_image(osd_img)
    print("det fps:",fps.fps())
    gc.collect()

# Exit loop and release resources
del ai2d
del kpu
sensor.stop()
Display.deinit()
time.sleep_ms(50)
MediaManager.deinit()
nn.shrink_memory_pool()
Run the sample code#
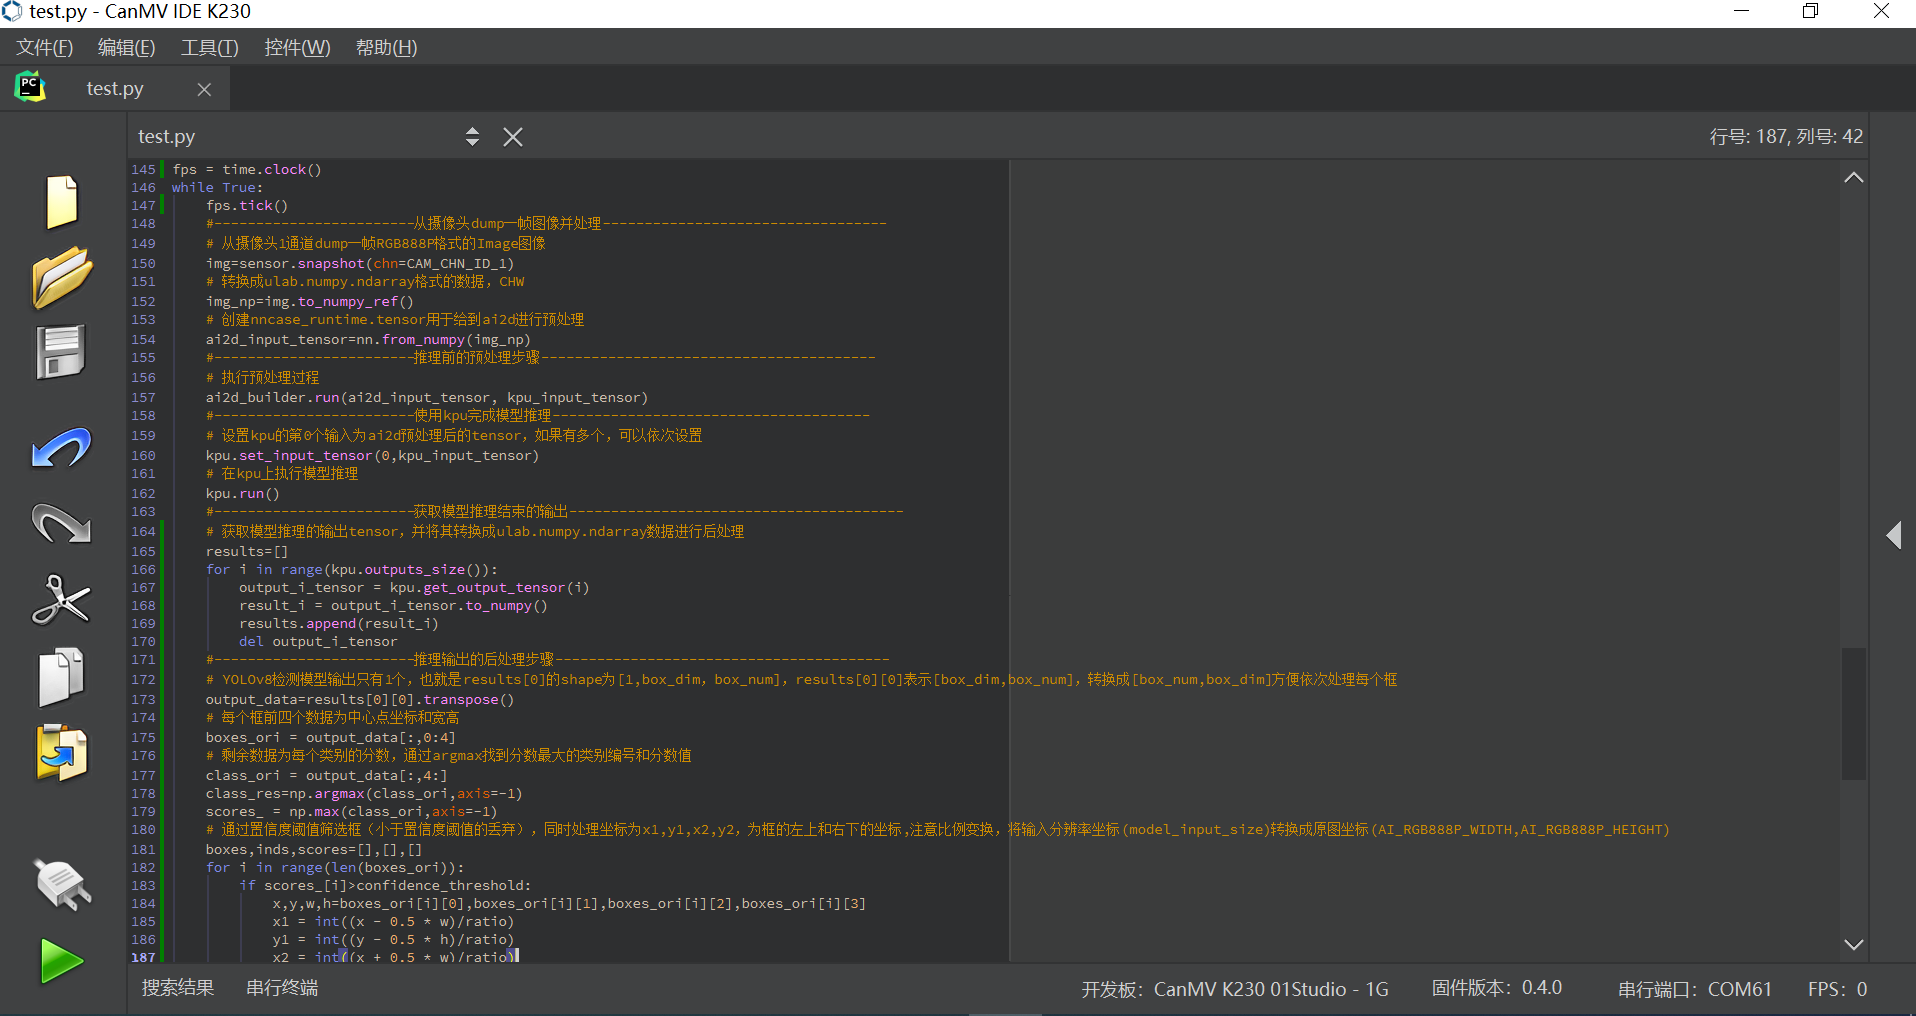
pass CanMV IDE K230 open the sample program code and click the Run button to start running the YOLOv8 detection sample program. For the use of IDE, please refer to:How to use IDE
Open the sample program through the IDE and run it as shown in the following figure:
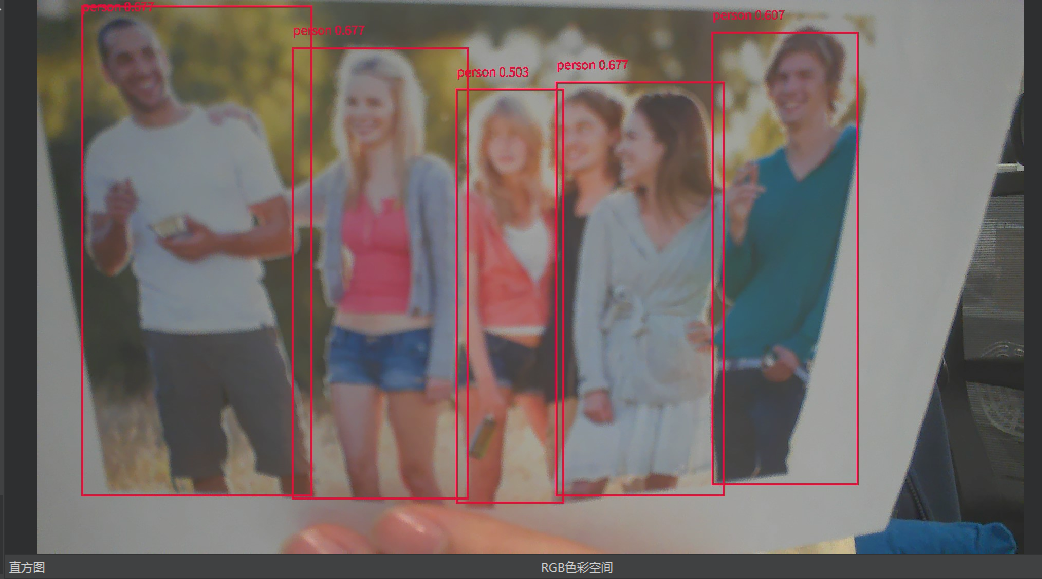
The operation results are shown in the figure below: