
EC200M-CN Module Usage#
Compilation#
Select the Appropriate Board#
make k230_canmv_01studio_defconfig
Enable the Required Configuration#
make rtsmart-menuconfig #执行该命令后,将下述的配置打开
Symbol: CHERRY_USB_HOST_ENABLE_CLASS_CDC_ECM [=n]
Type  : boolean
Prompt: Enable cdc ECM
   Location:
     -> Components Configuration
       -> Enable CherryUSB (ENABLE_CHERRY_USB [=y])
 (1)     -> Enable CherryUSB Host (ENABLE_CHERRY_USB_HOST [=y])
   Defined at components/Kconfig:109
   Depends on: ENABLE_CHERRY_USB [=y] && ENABLE_CHERRY_USB_HOST [=y]
 Symbol: CHERRY_USB_HOST_ENABLE_CLASS_SERIAL [=n]
 Type  : boolean
 Prompt: Enable SERIAL
   Location:
     -> Components Configuration
       -> Enable CherryUSB (ENABLE_CHERRY_USB [=y])
 (1)     -> Enable CherryUSB Host (ENABLE_CHERRY_USB_HOST [=y])
   Defined at components/Kconfig:93
   Depends on: ENABLE_CHERRY_USB [=y] && ENABLE_CHERRY_USB_HOST [=y]

 Symbol: CHERRY_USB_HOST_ENABLE_CLASS_SERIAL_EC200M [=n]
 Type  : boolean
 Prompt: Enable serial EC200M
   Location:
     -> Components Configuration
       -> Enable CherryUSB (ENABLE_CHERRY_USB [=y])
         -> Enable CherryUSB Host (ENABLE_CHERRY_USB_HOST [=y])
 (2)       -> Enable SERIAL (CHERRY_USB_HOST_ENABLE_CLASS_SERIAL [=n])
   Defined at components/Kconfig:99
   Depends on: ENABLE_CHERRY_USB [=y] && ENABLE_CHERRY_USB_HOST [=y] && CHERRY_USB_HOST_ENABLE_CLASS_SERIAL [=n]
Compile the Code and Download the Firmware to the Board#
make
EC200M-CN Usage Procedure#
Prepare the EC200M-CN Module#
Install the antenna on the module#
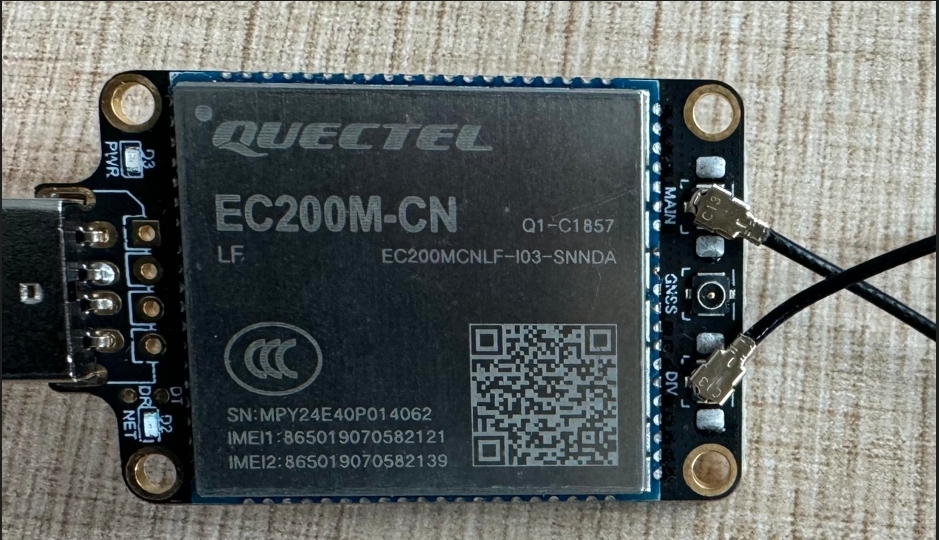
Insert the SIM card into the module#
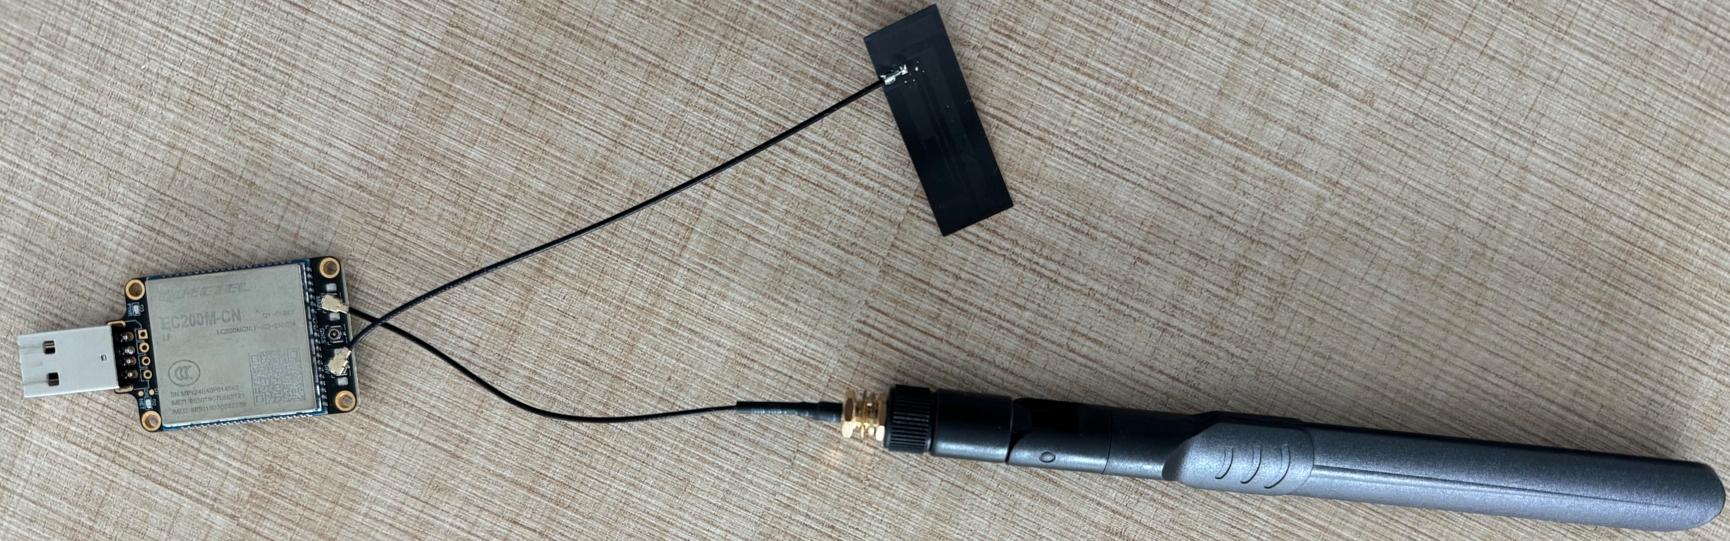
Insert the module into the USB port#
Dial-up internet access#
msh />rd /dev/ttyUSB1                                       #Will start a read thread to read the result returned by the AT command. By default, it will automatically exit after reading 150 bytes.
RDY


+CFUN: 1

+CPIN: READY


+QUSIM: 1

+QIND: SMS DONE

+QIND: PB DONE

msh />wr /dev/ttyUSB1 AT+qnetdevctl=1,1,1                   #Send the dial-up AT command
msh />AT+qnetdevctl=1,1,1

OK


+QNETDEVSTATUS: 1


msh />ping qq.com                                           #Can ping qq.com or www.baidu.com
60 bytes from 112.60.14.252 icmp_seq=0 ttl=52 time=77 ms
60 bytes from 112.60.14.252 icmp_seq=1 ttl=52 time=45 ms
60 bytes from 112.60.14.252 icmp_seq=2 ttl=52 time=42 ms
60 bytes from 112.60.14.252 icmp_seq=3 ttl=52 time=41 ms
EC200M-CN Debugging#
Read/Write Commands#
After the EC200M-CN module is enumerated, there are three ttyUSB interfaces, namely /dev/ttyUSB0, /dev/ttyUSB1, and /dev/ttyUSB2. We send AT commands through /dev/ttyUSB1.
The wr /dev/ttyUSB1 [data] command is used to send AT commands. It will directly open the device, send the command, and then close the device.
The rd /dev/ttyUSB1 command starts a read thread that blocks to read the return results of AT commands. By default, it automatically exits after reading 150 bytes. You can use the list_thread command to check whether the thread is still running. If it has exited, you can restart it.
msh />list_thread
thread               pri  status      sp     stack size max used left tick  error
-------------------- ---  ------- ---------- ----------  ------  ---------- ---
rd                    15  suspend 0x00000648 0x00000800    78%   0x0000000a OK
ifconfig Command#
After inserting the module, we can use ifconfig to check whether a network interface node has already appeared.
msh />ifconfig
network interface device: u0 (Default)
MTU: 1500
MAC: ae 0c 29 a3 9b 6d
FLAGS: UP LINK_UP INTERNET_DOWN DHCP_ENABLE ETHARP BROADCAST IGMP
ip address: 192.168.43.100
gw address: 192.168.43.1
net mask  : 255.255.255.0
dns server #0: 192.168.43.1
dns server #1: 0.0.0.0
AT Commands#
Query Network Card Mode#
The EC200M-CN hardware module supports two network card modes, namely ECM and RNDIS. The default is ECM mode, so we don’t need to modify it. Just check whether it is correct.
Returning “+QCFG: “usbnet”,1” indicates that the current mode is ECM network card mode, and returning “+QCFG: “usbnet”,3” indicates that the current mode is RNDIS network card mode.
msh />wr /dev/ttyUSB1 AT+QCFG="usbnet"
msh />AT+QCFG="usbnet"
+QCFG: "usbnet",1

OK
Set Network Card Mode#
Because we use ECM network card mode, no modification is required by default. However, if the module has been modified by other users, we can change it back to ECM mode, but the module needs to be restarted after modification.
msh />wr /dev/ttyUSB1 AT+QCFG="usbnet",1                    #Set to ECM network card mode
msh />AT+QCFG="usbnet",1
OK


msh />wr /dev/ttyUSB1 AT+CFUN=1,1                           #Send command to restart the module, or you can directly power cycle the board
msh />AT+CFUN=1,1

OK
Query SIM Card Status#
After connecting the module with the inserted SIM card to the system, we can use the following command to check the SIM card status. If the status is incorrect, try removing and reinserting the SIM card, or use a different SIM card.
msh />wr /dev/ttyUSB1 AT+CPIN?
msh />AT+CPIN?
+CPIN: READY

OK